Seasonal Tutorial: How to make Bath 'Bombs'
- Aug 5, 2022
- 3 min read
A fun Autumn project is to make your own bath bombs. It is the season of water after all, so how about some hand crafted herbal beauties for ritual bathing goodness?
After reading the ingredients in the so called “natural” bath bombs, which include synthetic ingredients such as polysorbate 80 and glitter, I started making my own. These are are really fun project to involve little ones (there is a lot of mixing involved) and you can customize them with dried flower petals, essential oils, and fun shapes. I had heard that many homemade bath bombs don’t turn out and end up falling apart. Thankfully, these stay together even if they did turn out a little uneven. Uneven = organic and natural though, right?
To make these, you will need a form to press them into, such as a muffin tin or small jars. You can also purchase bath bomb molds. We used muffin tins and they worked quite well. Also, if you have a hand mixer, that will save you considerable time mixing by hand (though you can successfully mix by hand).
You Will Need:
— Large bowl — Hand mixer or wood spoon — Sifter — Measuring cups and spoons — Muffin tin or other mold to press bath bombs into — 1 cup baking soda — 1/2 cup arrowroot powder (can also use cornstarch) — 1/2 cup citric acid — 2 tablespoons oil of your choice (I used jojoba) — Few drops of essential oils (ylang ylang + rose geranium, rose, lavender all work great) for scent — Witch hazel in a spray bottle — Dried flower petals
Method:
Sift the baking soda, arrowroot powder, and citric acid into a medium bowl, Wisk together with a spoon.
Add 6 teaspoons of oil — let the oil drip into the mixture and stir with a spoon in between each drop.
Once you have added the all the oil, use a hand mixer on low to speed up the mixing process. Otherwise, mix with a spoon until the oil is completely mixed in, and the mixture looks a bit like kinetic sand.
Add a few drops of essential oils. Mix in between each drop until the oils are completely mixed in.
Spray the mixture with a couple spritzes of witch hazel. Stir well in between spritzes to prevent the mixture from fizzing. This is the most delicate part of the recipe, you need to add just enough witch hazel to combine the mixture but not too much or it will start fizzing. Go slowly, and squeeze handfuls of the mixture until you reach the consistency of kinetic sand.
Once the mixture is clumping together when you squeeze a handful, and remains clumped when you drop it, you are ready for the next step.
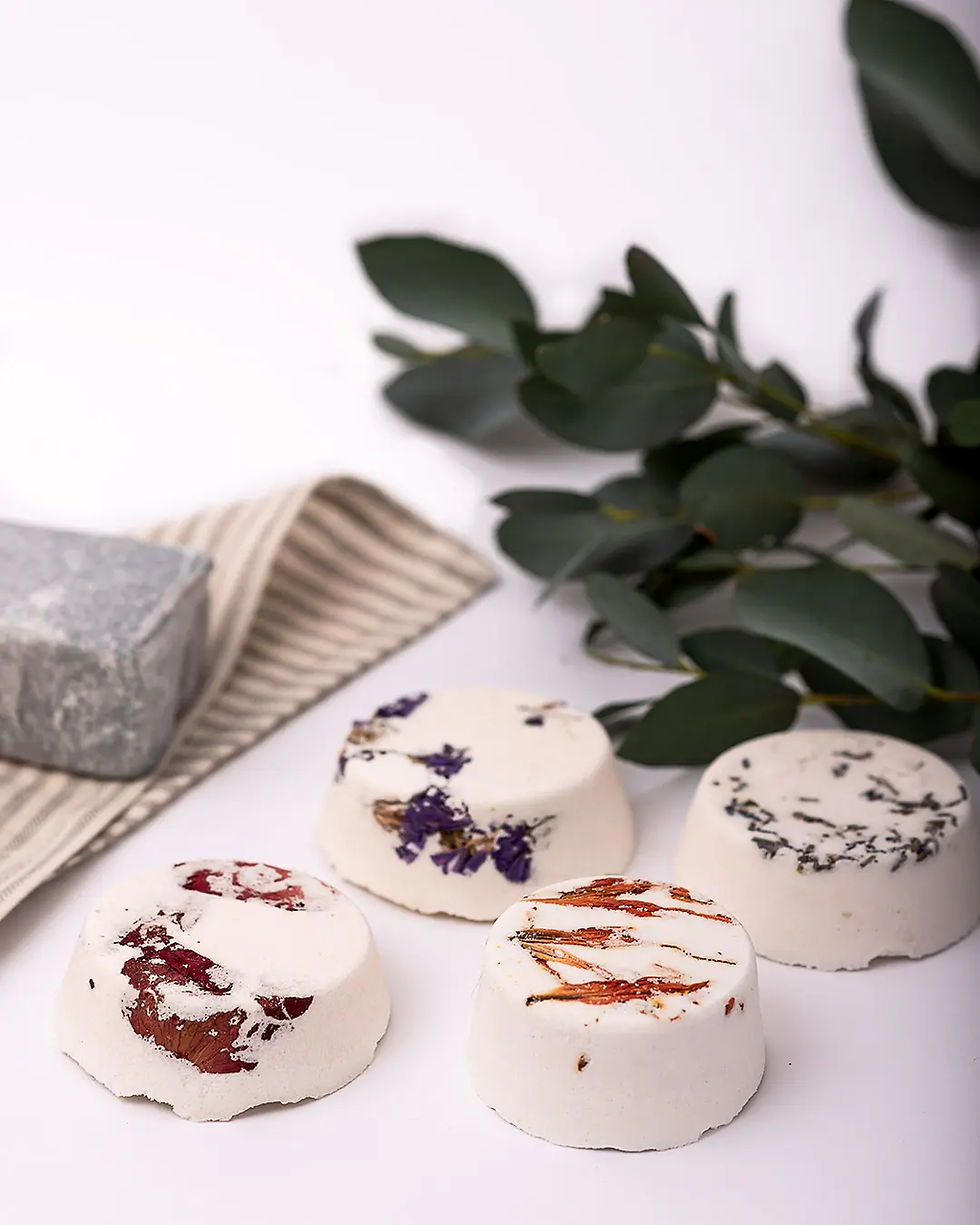
Place flower petals (if desired) attractively on the bottom of the muffin tin. Add enough petals so they remain visible after the mixture presses into them (more then you think). Fill each mold with the mixture, pressing down firmly as you go. (I used the bottom of the glass spray bottle to press down). Press until the mixture is hardened, and keep filling and pressing down until you reach the height you want your bath bombs to be.
To dry, you have two options:
Allow to dry on the countertop for 24 hours, or
Dry in the oven for 1-4 hours. I went with this option because Skye was in a hurry to try the bath bombs, and they turned out perfect. Simply turn your oven on the warm setting, and place the muffin tin in. Check after one hour by pushing your nail into the bath bomb. I left mine in for about two hours.
Et Voila!


